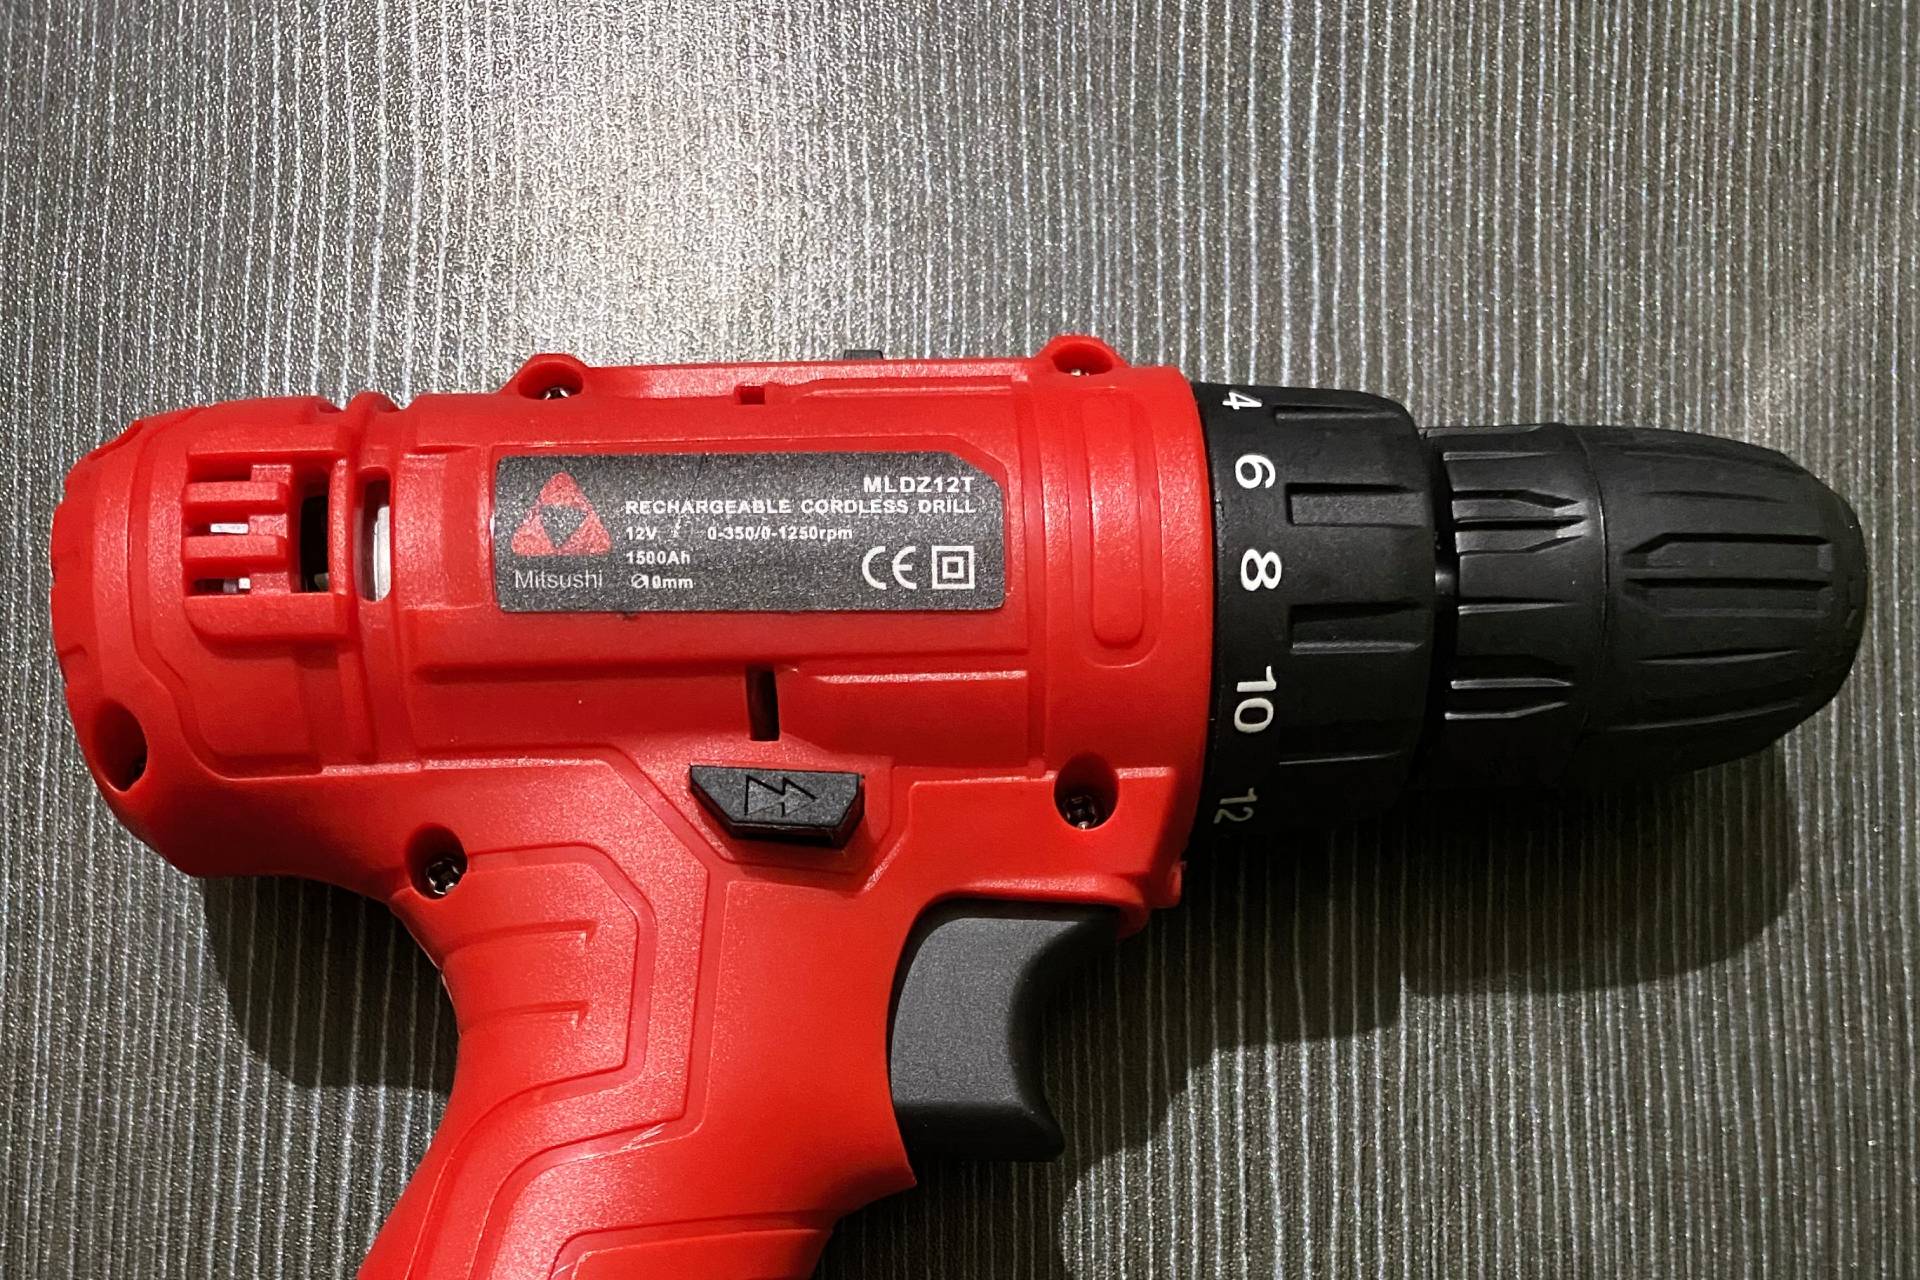
Just bought the Mitsushi 12V Double Speed Cordless Drill (Model: MLDZ12T) from Lazada and struggling to make holes in your concrete walls? You’re not alone. This guide will walk you through the exact steps I used to successfully drill into hard concrete using this specific model, even without a hammer function.
What You Need to Know First
The Mitsushi 12V Double Speed Cordless Drill (MLDZ12T) is a solid budget option, but it lacks a hammer drill feature. This means drilling into hard concrete takes more patience and technique than hammer drills. A hammer function creates a repetitive pounding motion that helps break through concrete much faster. Without it, you’ll rely purely on rotation and pressure—which is doable, but requires the right approach.
Important Note About the Manual
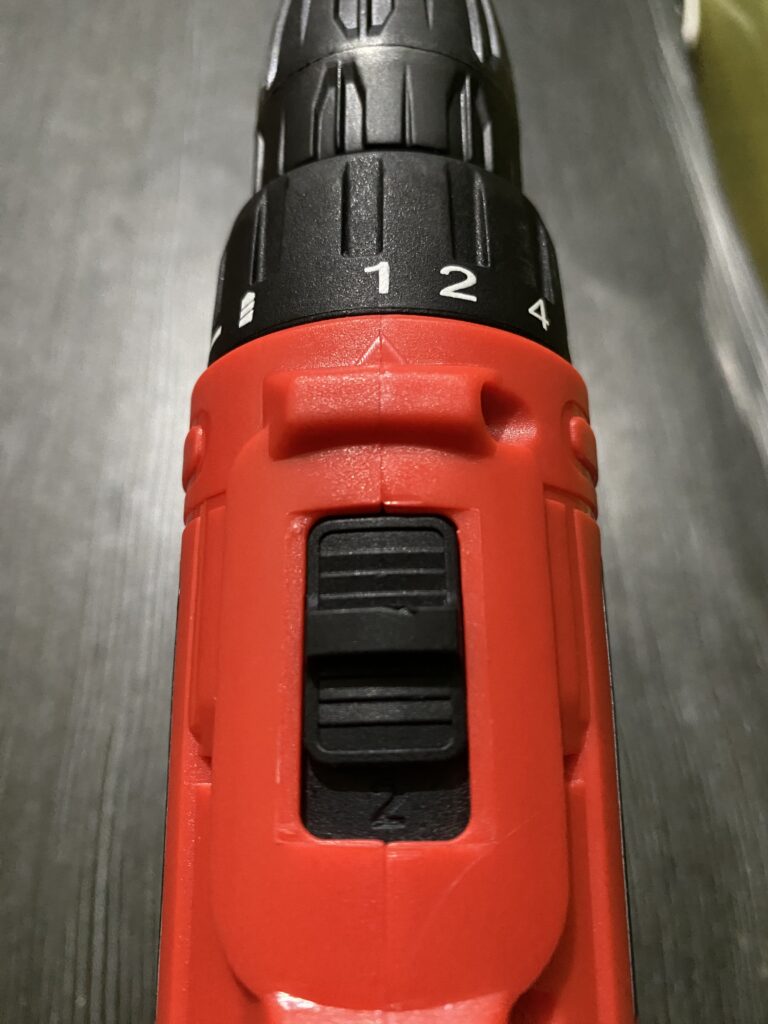
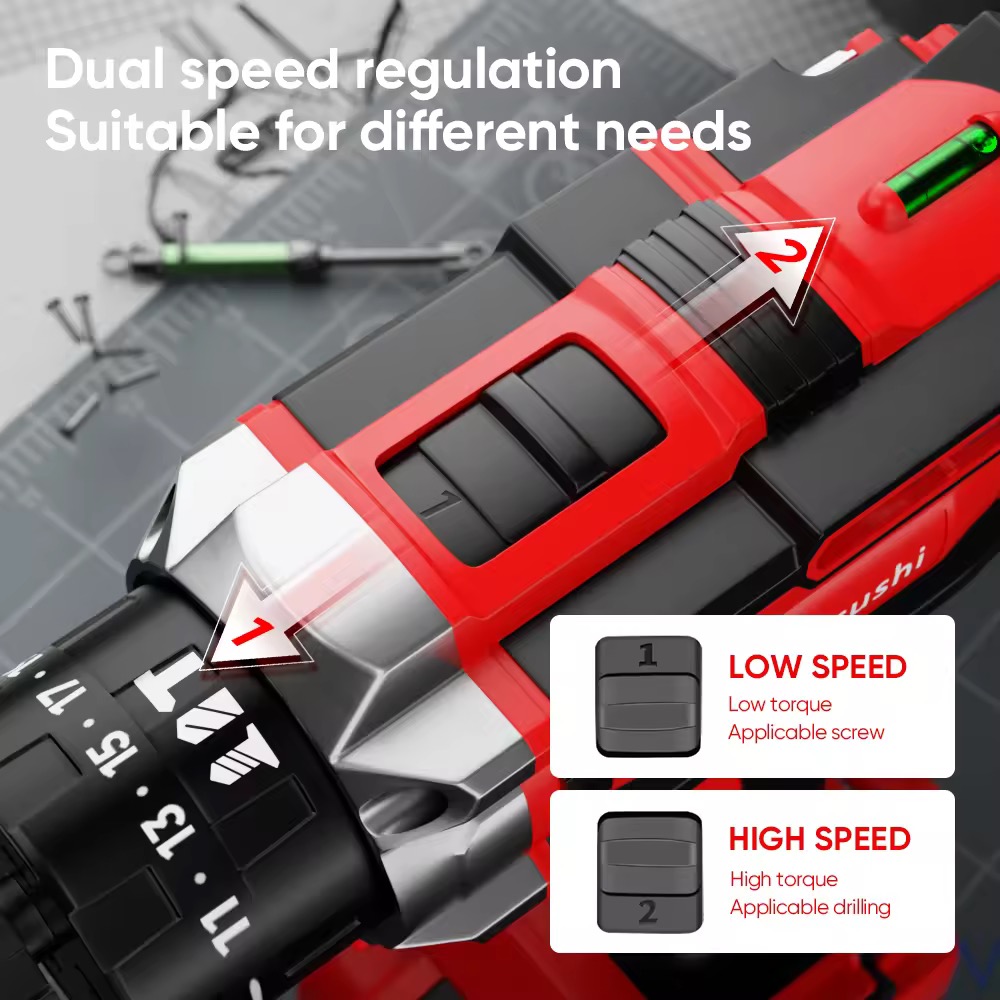
If you received a manual that doesn’t match your drill, you’re not alone! I received what appears to be the MIT-1013 instruction manual with my MLDZ12T, and it caused confusion because the speed settings are labeled differently:
- MIT-1013 manual says: Low = 1, High = 2
- MLDZ12T actual settings: High = 1, Low = 2
This guide uses the correct settings for the MLDZ12T model you actually have. Always test your drill’s settings if your manual seems confusing—the physical drill is what matters, not the paperwork!
What You’ll Need
- Mitsushi cordless drill (fully charged)
- Concrete drill bits (multiple sizes recommended)
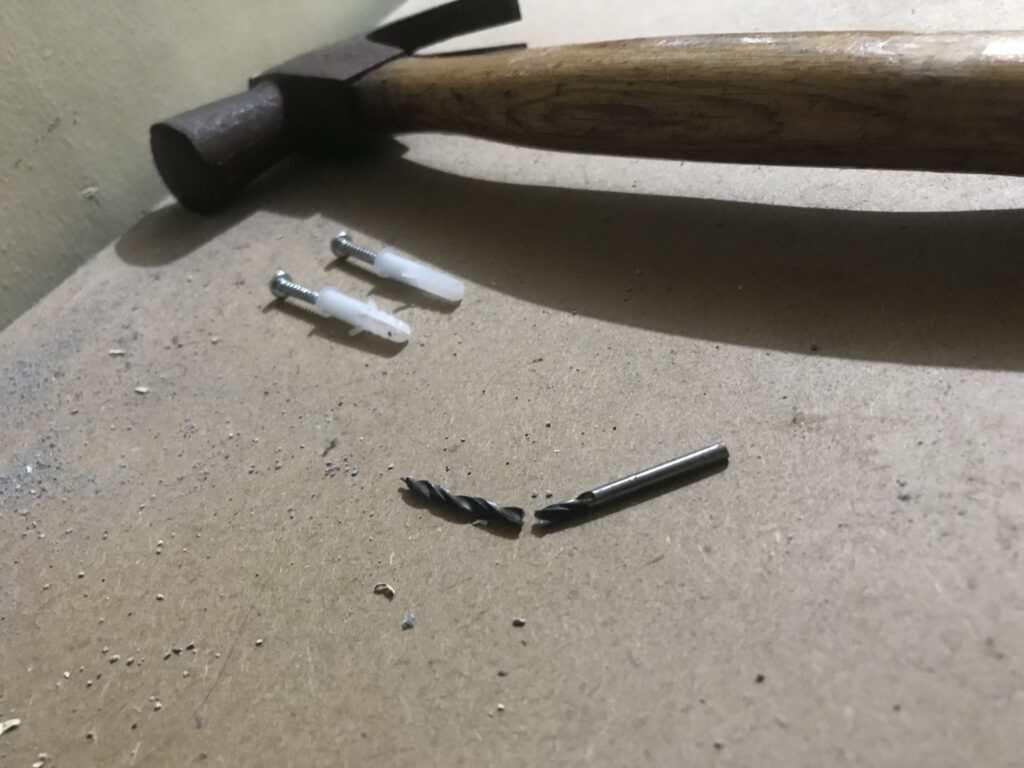
- Hammer and nail (for starting holes in very hard concrete)
- Tox anchors and screws (match drill bit size to anchor width)
- Safety glasses
- Dust mask (concrete dust can be harmful)
Step 1: Setting Up Your Drill Correctly
Getting the right settings is crucial for drilling concrete effectively.
Speed and Gear Settings
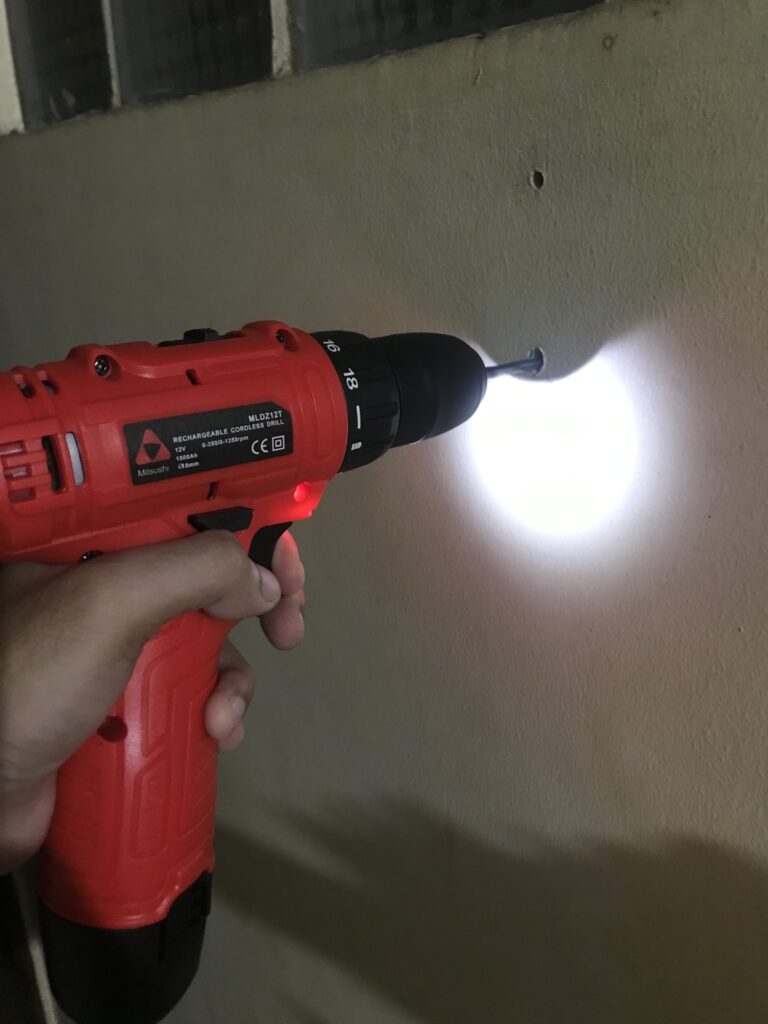
- Set the two-speed adjustment to “1” (located at the top of the drill). For the MLDZ12T, this is the HIGH speed setting, which gives you maximum torque for drilling concrete. (Note: If you received the wrong manual like I did, ignore what it says—setting 1 is high speed on this model)
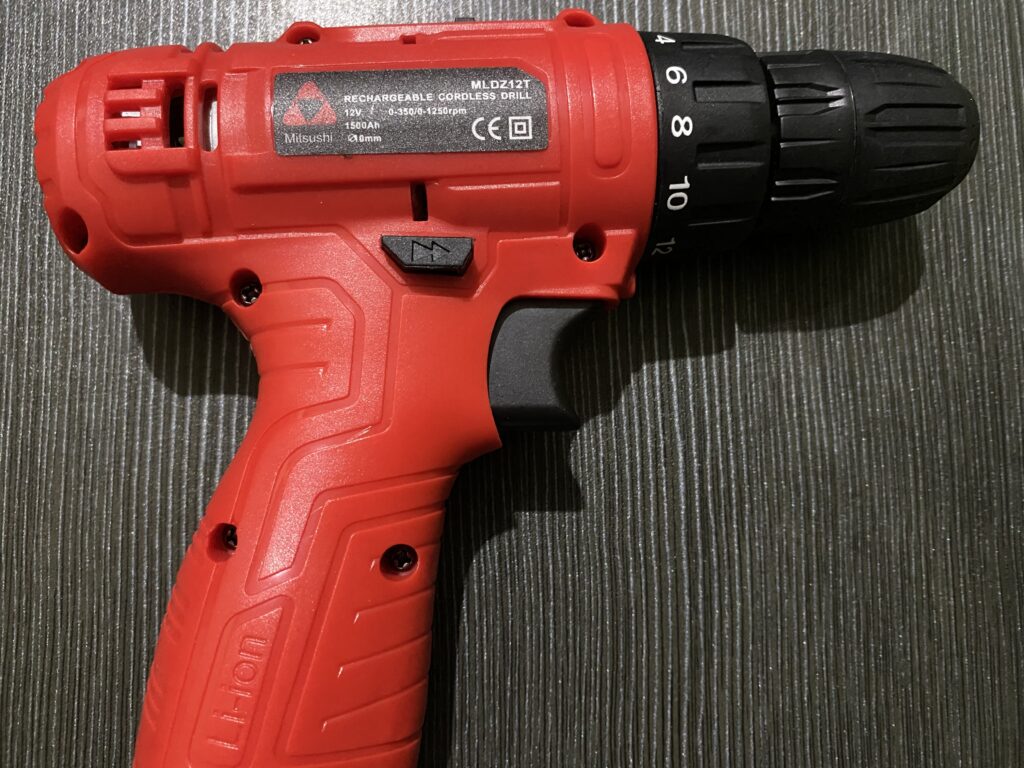
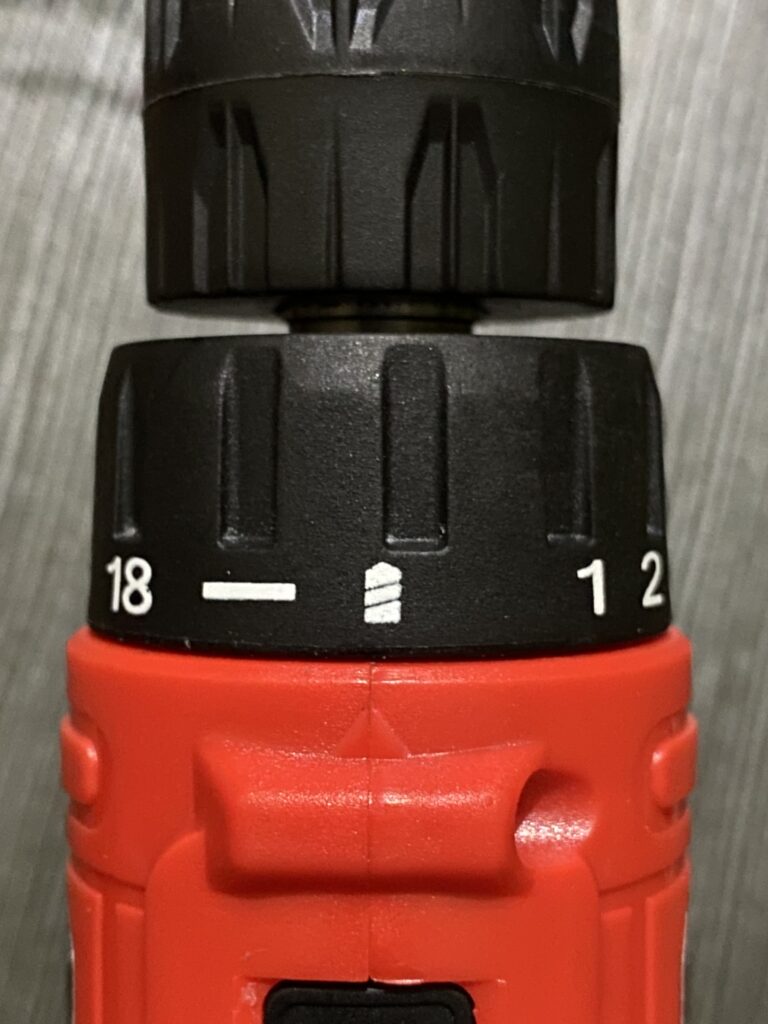
- Select “Drill mode” on the torque adjustment ring. This is the last setting on the 18-position torque gear, usually marked with a drill bit icon.
Choosing the Right Drill Bit
Match your drill bit size to the width of the tox anchor and screw you plan to use. For example:
- 6mm tox anchor = 6mm drill bit
- 8mm tox anchor = 8mm drill bit
Pro tip: Start with a smaller bit (4-5mm) to create a pilot hole, then upgrade to your final size. This makes drilling much easier, especially in very hard concrete.
Installing the Drill Bit
- Hold the drill firmly
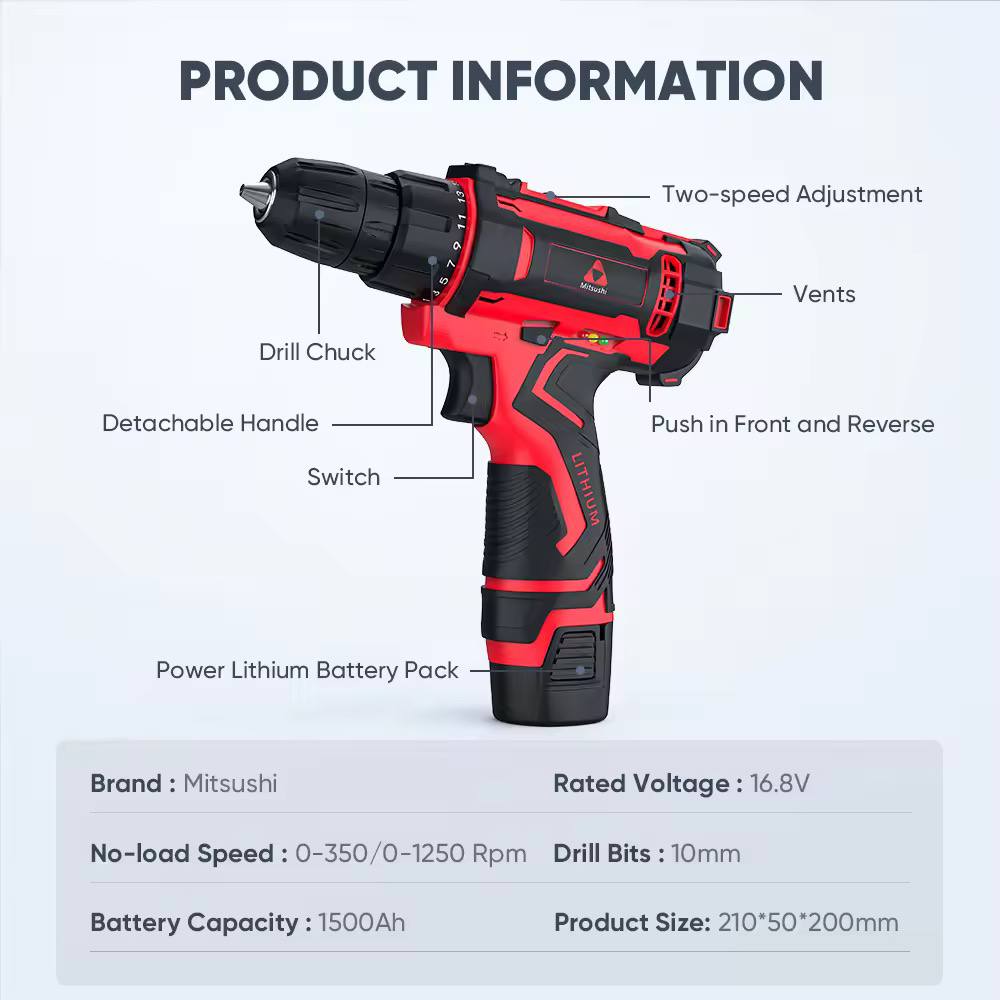
- Rotate the Drill Chuck (the black collar at the front) counter-clockwise to open the jaws
- Insert your drill bit fully
- Tighten by rotating the Drill Chuck clockwise until snug
- Give it an extra firm twist to ensure it’s secure
Step 2: Creating the Initial Hole
This is where patience becomes your best friend.
For Moderately Hard Walls
- Position the drill bit exactly where you want the hole
- Start drilling at a slow, steady pace
- Apply gentle but firm pressure—push just enough to feel the drill working
- Let the drill do the work; don’t force it
For Very Hard Concrete
If the drill bit just won’t penetrate (I ran into this multiple times):
- Use the hammer and nail technique:
- Take a nail and hammer
- Tap the nail into the wall to create a small starter divot
- This gives your drill bit a place to “grab”
- Then switch to the drill:
- Start with your smaller pilot bit, or
- Go directly with your final size bit (I found this worked once the starter hole was made)
Step 3: Drilling Deeper into Concrete
Here’s where technique really matters.
The Right Amount of Pressure
- Too little pressure: The drill bit just spins without cutting
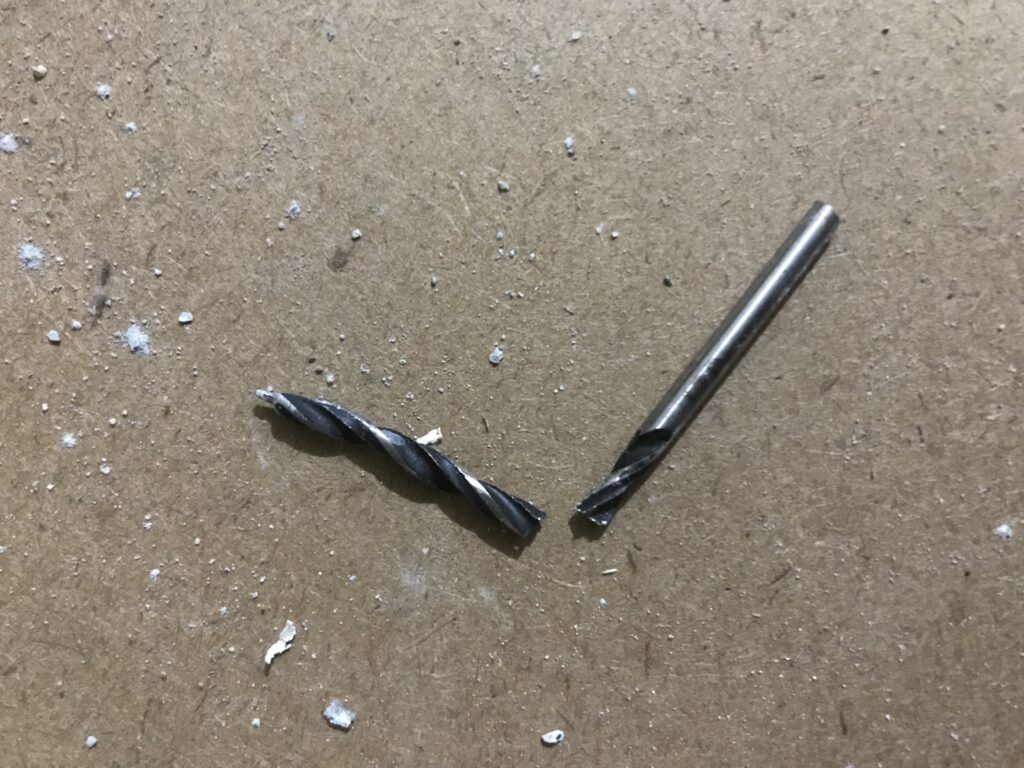
- Too much pressure: You’ll overheat the bit or break it (yes, I broke one this way)
- Just right: You feel steady vibration in the wall
When you feel vibration traveling through the wall, that’s your sweet spot. This means you’re effectively grinding through the concrete.
Common Issue: Drill Bit Loosening
As you apply pressure, the Drill Chuck may loosen, causing the bit to wobble. When this happens:
- Stop drilling immediately
- Re-tighten the Drill Chuck by rotating counter-clockwise
- Resume drilling
This happened to me several times—it’s normal with this drill model when drilling hard materials.
Technique for Stubborn Spots
When progress slows:
- Ease off the pressure slightly
- Wait for vibration to return before pushing again
- Pull the drill back occasionally to clear concrete dust from the hole
- Use a circular motion inside the hole to widen it gradually
- Be patient—some spots just take longer
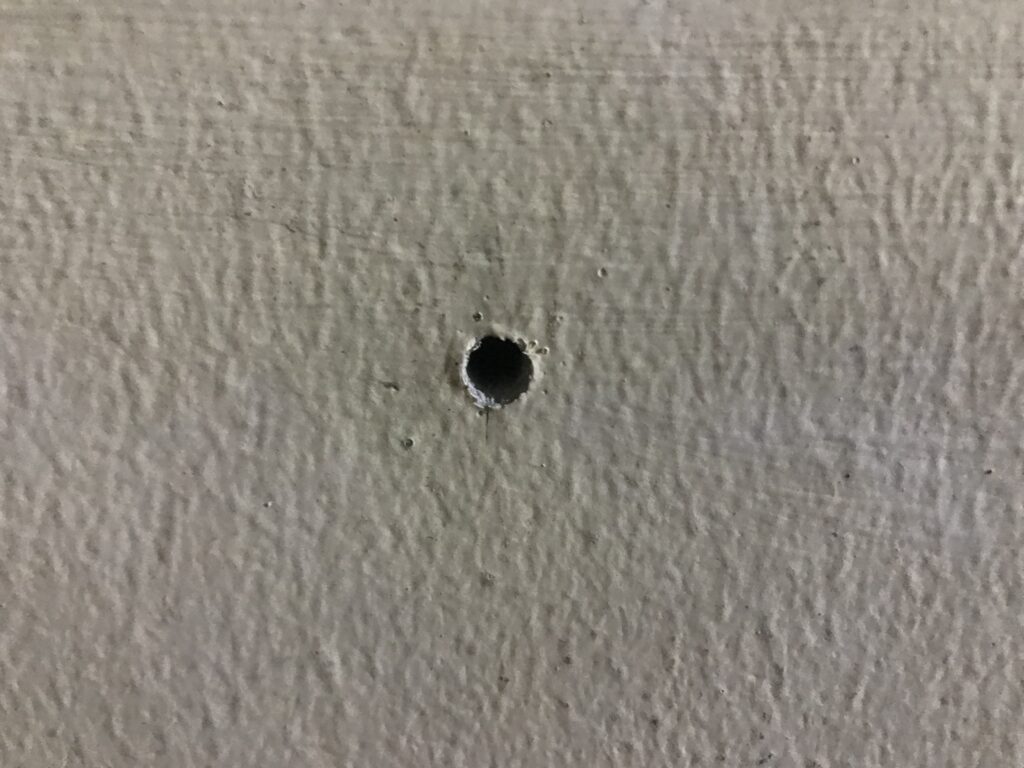
Step 4: Finishing and Widening the Hole
Once you’ve broken through:
- Continue drilling to your desired depth
- Use a gentle circular motion with the drill to smooth the hole
- Periodically remove the bit and blow out concrete dust
- Test-fit your anchor to ensure proper depth and width
Safety Tips and What NOT to Do
⚠️ Don’t apply excessive force – I broke a drill bit in half doing this. The bit snapped and could have caused injury.
⚠️ Wear safety glasses – Concrete dust and chips will fly toward your face.
⚠️ Take breaks – Let the drill cool down every few minutes to prevent overheating.
⚠️ Check for wires and pipes – Use a stud finder or wall scanner before drilling to avoid hitting electrical wiring or plumbing.
Troubleshooting Common Problems
Problem: Drill bit won’t penetrate at all
- Solution: Use the hammer and nail technique to create a starter hole
- Or try a smaller pilot bit first
Problem: Drill bit keeps loosening
- Solution: Tighten the Drill Chuck more firmly before starting
- Check that you’re rotating it the correct direction (clockwise to tighten)
Problem: Drill feels weak or slow
- Solution: Charge the battery fully
- Ensure you’re on Speed Setting 1 and Drill mode
Problem: Smoke or burning smell
- Solution: Stop immediately—you’re overheating the bit
- Let it cool down and use less pressure with more patience
Final Thoughts: Is This Drill Right for Concrete?
The Mitsushi 12V MLDZ12T can definitely handle concrete drilling for home projects, but you need to set realistic expectations. Without a hammer function, it takes longer and requires more technique than a proper hammer drill.
This 12V model works best for:
- Occasional home drilling projects
- Mounting picture frames, shelves, and light fixtures
- Softer concrete or cinder blocks
- Budget-conscious DIYers
Consider upgrading if you need more power:
If you’re planning more frequent or demanding concrete drilling, here are two upgraded Mitsushi options worth considering:
1. Mitsushi MIT-1013 (With Hammer Function)
This model includes the hammer drill feature that the 12V lacks. The hammer function makes a huge difference when drilling concrete—it can cut your drilling time in half and requires much less effort. If you’re planning to drill multiple holes or work with very hard concrete regularly, this upgrade is worth every peso.
2. Mitsushi MLDZ1006 16.8V
With 16.8V compared to the 12V model, this drill offers significantly more power. The extra voltage means more torque and faster drilling, even without a hammer function. This is a good middle-ground if you want better performance but don’t necessarily need the hammer feature.
Despite the 12V model’s limitations, I successfully mounted everything I needed using the techniques above. The key is patience and the right approach. But if you find yourself drilling concrete frequently, investing in one of these upgraded models will save you considerable time and frustration.
Have questions or tips of your own? Drop them in the comments below—I’d love to hear about your experience with this drill!
Disclaimer: Always follow manufacturer instructions and safety guidelines. Wear appropriate safety equipment when drilling.